Recover Files Instantly
System requirements:
Windows XP, 2003, Vista, 2008, 7, 8, 10 & 11.
(Both 32-Bit and 64-Bit Windows are supported.)
Support and Contact Information for NTFS Undelete
NTFS Undelete is a small utility that scans your hard drive for all files that can be undeleted and attempts to recover the files for you.
Sounds like magic? It isn't. You might not know it, but when you tell Windows to erase a file, Windows essentially does something like say "okay, I am now going to consider this file null and void, and will allow other data writing operations to use the space that it occupies". In other words, no actual 'erasing' of the file occurs until Windows has a need to write over the hard drive space where that file resides. NTFS Undelete and programs like it do a thorough scan for files that are 'still there' on the hard drive and/or files that have enough data remaining that they can be recovered. Of course, the sooner you attempt to recover the files the better your chances are for successful recovery.
Overview
NTFS Undelete is a quick and effective way to retrieve deleted files, files removed from the Recycle Bin, in a DOS window, or from Windows Explorer with the SHIFT key held down. NTFS Undelete with its clean and simple interface, is small, fast, useful, practical, and powerful.
There's nothing quite like losing an important file you spent hours working on. However, just because you deleted a file, it doesn't mean it's gone for good. You can use recovery software to recover files that have been deleted. You might not always be successful, but most of the time you'll have your files back in no time.
NTFS Undelete works with the Windows XP/2003/Vista/2008/7/8/10 and Windows 11 Operating Systems. It supports all Windows filesystems for hard and floppy drives including FAT12/16/32, NTFS/NTFS5, and image recovery from CompactFlash, SmartMedia, MultiMedia and Secure Digital memory cards.
NTFS Undelete does the following:
- Recovers deleted files from NTFS/NTFS5 and FAT12/FAT16/FAT32 volumes.
- Restores deleted files on Windows 11, Windows 10, Windows 8, Windows 7, Windows 2008, Windows Vista, Windows 2003, and Windows XP.
More Features:
- After scanning your drive, NTFS Undelete creates file type icons in the left pane that allow you to easily filter by file type.
- NTFS Undelete creates a folder view of the deleted files.
- NTFS Undelete allows you to filter the results by size, date modified, date created, and parts of the files' names.
- NTFS Undelete is small, fast, useful, practical, and powerful.
System Requirements
NTFS Undelete requires Windows XP, Windows 2003, Windows Vista, Windows 2008, Windows 7, Windows 8, Windows 10 or Windows 11. Both 32-Bit and 64-Bit Windows are supported.
Installation
-
Download latest version of NTFS Undelete from the Download page.
-
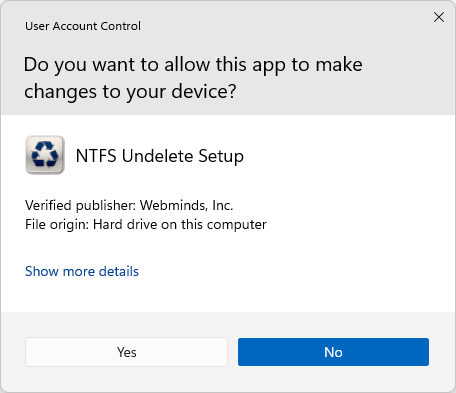
Click the Yes button in the popup window to start the Installation Wizard.
-
Click the Next button in the Installation Wizard.
-
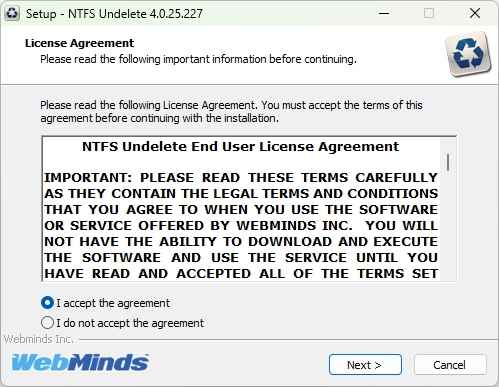
Read the End User License Agreement, select the I accept the agreement radio button, and then click the Next button to continue with the installation.
-
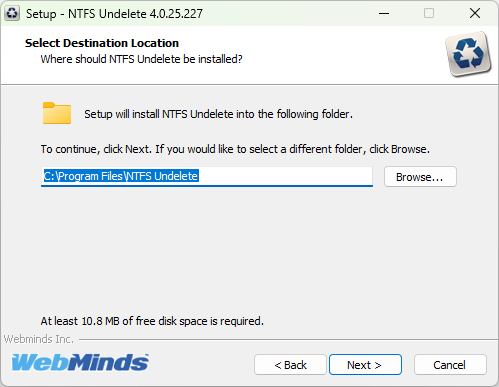
Click the Next button to accept the local file location for NTFS Undelete.
-
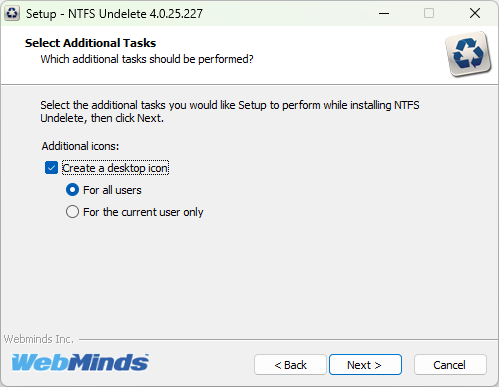
Select the Create a desktop icon checkbox to be able to access NTFS Undelete from your desktop. You can also choose whether you want a desktop icon created for all users or the current user only.
-
Click Install to begin the installation.

Uninstallation
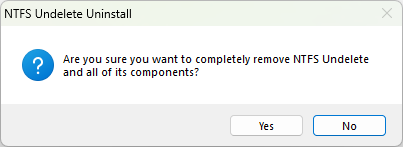
Complete the following steps to remove NTFS Undelete from your system:
- Go to Start > All Programs > NTFS Undelete> Uninstall NTFS Undelete
-
Click the Yes button to begin remove NTFS Undelete from your system.
-
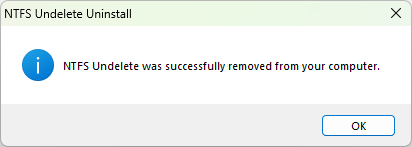
Click the OK button after NTFS Undelete has been removed from your system.
Quick Start Guide
The latest version of NTFS Undelete is available for download from the Download Page, or by clicking the "Update" button within the program. If possible, avoid installing NTFS Undelete to the drive from which you are trying to recover your deleted files. For more information on installing NTFS Undelete, click here
-
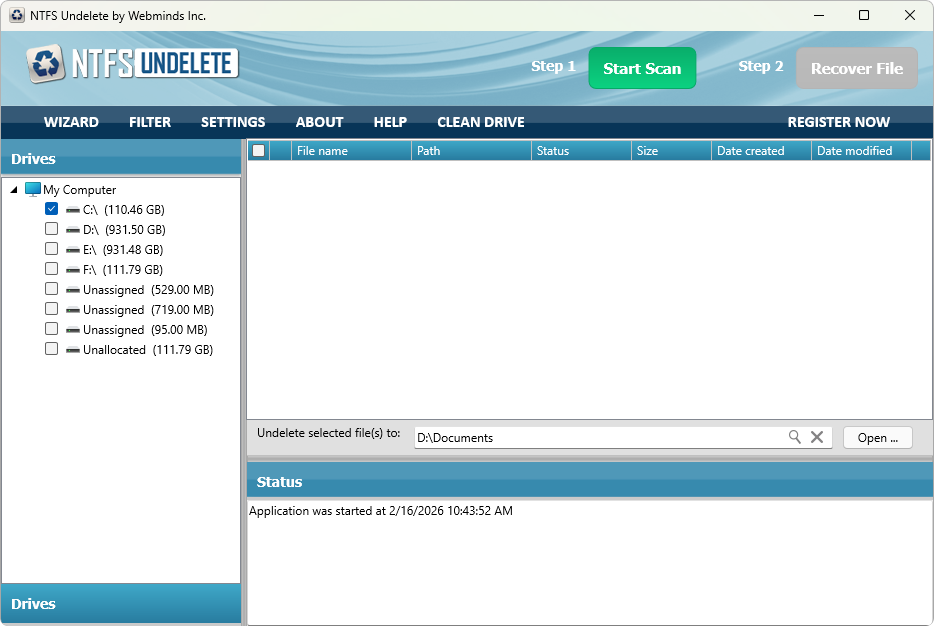
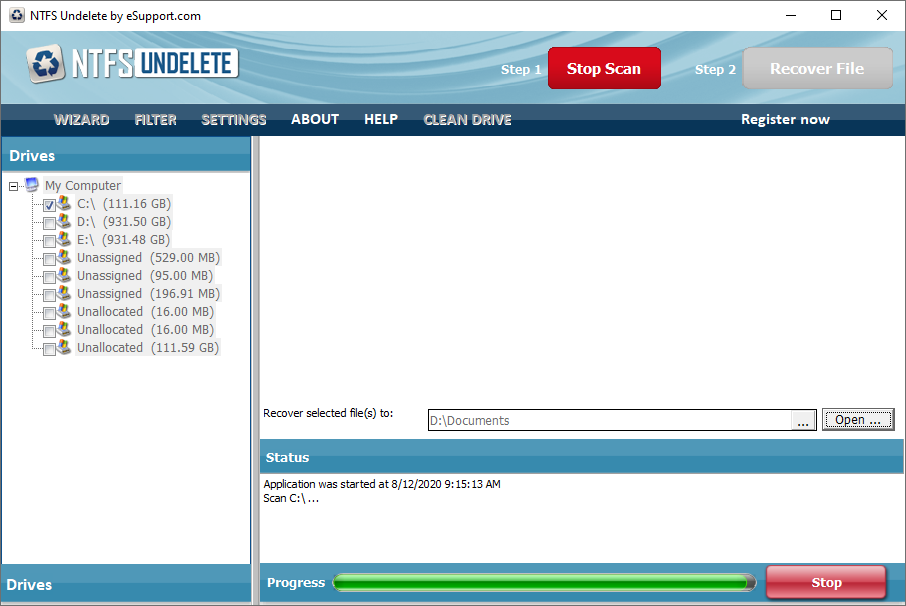
Select the Drive To Scan
-
When you run NTFS Undelete the application opens and on the left side of the application window is the drive selection panel. From this panel select the drive to scan (hard drive, digital camera, flash drive, etc.) by selecting the checkbox next to the appropriate drive letter.
Drive Panel
-
-
Scan the Drive
- Click on the Start Scan button to scan the selected drives.
- Once the scan is started the progress bar displays the portion of the scan remaining.
-
Manage the Results
-
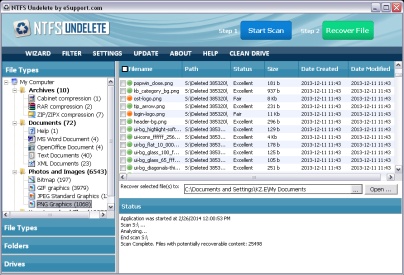
After the scan has completed NTFS Undelete displays the following information and options for you to utilize in order to find the files you want to recover:
-
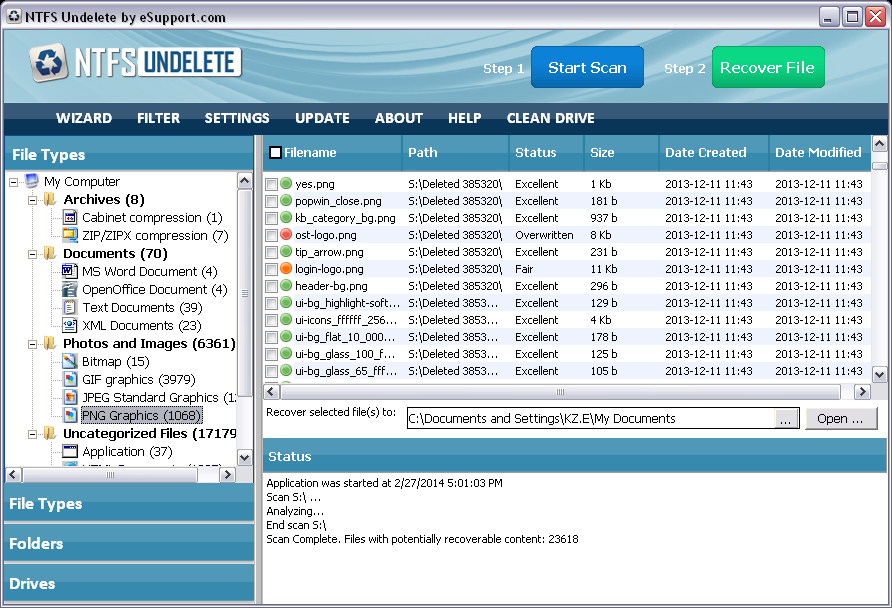
The "Folders" pane shows the folder structure of the deleted files for the drive(s) that you selected. In some situations a folder name is destroyed, in which case the name format is "Deleted XXXXX".
Note: The sub folders usually retain their original name. -
The Folders and File Types Panes
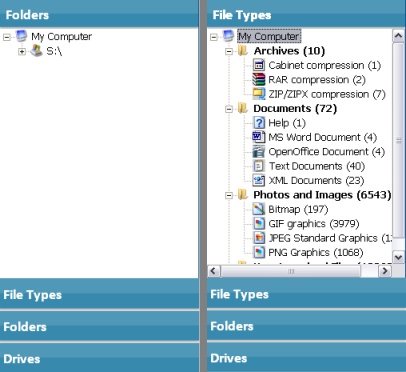
Folders: Displays the folder(s) found by the scan.
File Types: The files found by the scan are placed into categories by file type. Any files that are found that do not belong to a known file type are placed in the "Other Files" category. When a file type is selected, the files found in that category are displayed in the "Results Pane". You can sort the list of files in this pane by clicking on the column headings. When you click on a file name its contents are displayed in the Preview pane.To list all files found, click on "My Computer" in either the "File Types" or "Folders" pane.
-
Status and Preview
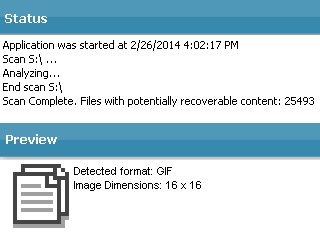
Status: The "Status" pane contains overhead information.
Preview: Displays a preview of the potentially recoverable content. -
Filtering the Scan Results
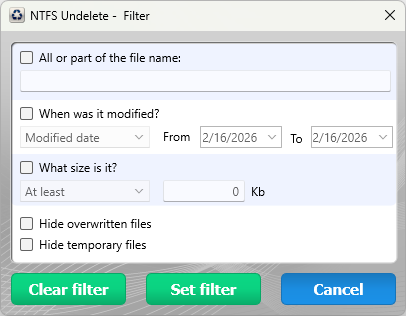
The filter option is accessed by clicking the "Filter" button at the top of NTFS Undelete. Determine how you want NTFS Undelete to filter the results then click the "Set Filter" button. To remove the filter click the "Clear" button.
All or part of the file name:
Type all or part of the file name here.
Note: The filter will search for the characters you type anywhere in the file name, including the file extension.Example 1: doc
Typing the letters doc would display the following files in the "Results" pane if they were deleted:todolist.doc
todolist.doc.old
documentation.txt
WomanDoctor.jpg
MyResume.docxExample 2: .doc
Typing .doc would display the following files in the "Results" pane if they were deleted:todolist.doc
todolist.doc.old
MyResume.docxWhen was it modified?
Select this checkbox to filter the results based on the file creation date or the file modification date. Select a date type, Created or Modified from the dropdown menu, and then set an appropriate date range.What size is it?
Select this checkbox to filter the results based on file size. Select "at least" or "at most" from the dropdown menu and then enter the approximate file size in the Kb field, or use the arrows to set the file size.Hide overwritten files
Select this checkbox to filter out overwritten files.Hide temporary files
Select this checkbox to filter out temporary files.
-
-
Save the Recovered Files
When NTFS Undelete saves a recovered file it reads the file's contents and then writes its contents to a new file with the same name. Remember to save the files that you are recovering to a different drive to avoid the risk of overwriting the other files that you want to recover. Later you can restore the recovered files to their original locations once you have recovered all the files you need.
IMPORTANT! To minimize the chance of corrupting any remaining lost files, do not to save the recovered files back to the original drive until after completing all attempts to recover any lost files.
Complete the following steps to recover a deleted file:
-
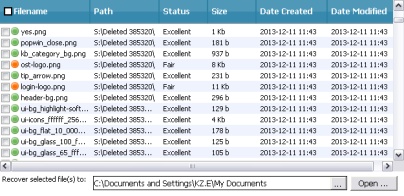
In the "Results Pane" select the checkbox of the file or files to be recovered.
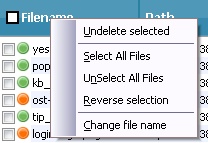
To select all files, right click on Filename then click Select All Items from the menu.
- Click the Recover File button to recover the selected files.

-
Click the Yes button in the "Possible Data Loss" popup box.
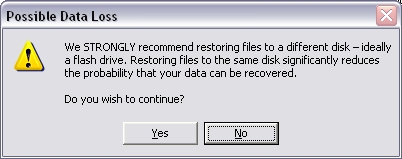
Recovered files are copied to the folder specified in the Recover selected file(s) to: section.

Select the Drive to Scan
Complete the following steps to begin the process of recovering deleted files:
- Open NTFS Undelete
-
In the Drives pane, select the drive that you want to scan. This can be a hard drive, digital camera, USB drive, or another item connected to your system.
Note: To exclude a drive from the scan deselect the checkbox next to that drive.
-
Click the Start Scan button.

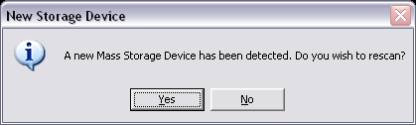
NTFS Undelete is able to detect if a new drive is connected to the computer after you started your initial scan. To scan the new drive click the Yes button in the popup window.
Scan the Drive
Click on the Start Scan button to scan the selected drives.
Once the scan is started the progress bar at the bottom of NTFS Undelete displays the portion of the scan remaining. To stop the scan click the Stop button next to the progress bar. Note: If you stop the scan before it is done, NTFS Undelete will only display a list of files found up until the point at which the scan was stopped.

Manage the Results
After the scan has completed NTFS Undelete displays the following information and options for you to use to find the files you want to retrieve:
-
The Results Pane
The Folders pane shows the folder structure of files that were recovered. In some situations a folder name is destroyed, in which case the name format is "Deleted XXXXX".Note: The sub folders usually retain their original name.
-
The Folders and File Types Panes
Folders: Displays the folder(s) found by the scan.
File Types: The files found by the scan are placed into categories by file type. Any files that are found that do not belong to a known file type are placed in the "Other Files" category. When a file type is selected, the files found in that category are displayed in the "Results" pane. You can sort the list of files in this pane by clicking on the column headings. When you click on a file name its contents are displayed in the "Preview" pane.To list all files found, click on "My Computer" in either the "File Types" or "Folders" pane.
-
Status and Preview
Status: The Status pane contains overhead information.
Preview: Displays a preview of the potentially recoverable content. -
Filtering the Scan Results
The filter option is accessed by clicking the "Filter" button at the top of NTFS Undelete. Determine how you want NTFS Undelete to filter the results then click the "Set Filter" button. To remove the filter click the "Clear" button.
All or part of the file name:
Type all or part of the file name here.Note: The filter will search for the characters you type anywhere in the file name, including the file extension.
Example 1: doc
Typing the letters doc would display the following files in the "Results" pane if they were deleted:todolist.doc
todolist.doc.old
documentation.txt
WomanDoctor.jpg
MyResume.docxExample 2: .doc
Typing .doc would display the following files in the "Results" pane if they were deleted:todolist.doc
todolist.doc.old
MyResume.docxWhen was it modified?
Select this checkbox to filter the results based on the file creation date or the file modification date. Select a date type, Created or Modified from the dropdown menu, and then set an appropriate date range.What size is it?
Hide overwritten files
Select this checkbox to filter the results based on file size. Select "at least" or "at most" from the dropdown menu and then enter the approximate file size in the Kb field, or use the arrows to set the file size.
Select this checkbox to filter out overwritten files.
Hide temporary files
Select this checkbox to filter out temporary files.
Save the Recovered Files
When NTFS Undelete saves a recovered file it reads the file's contents and then writes its contents to a new file with the same name. Remember to save the files that you are recovering to a different drive to avoid the risk of overwriting the other files that you want to recover. Later you can restore the recovered files to their original locations once you have recovered all the files you need.
IMPORTANT! To minimize the chance of corrupting any remaining lost files, do not to save the recovered files back to the original drive until after completing all attempts to recover any lost files.
Complete the following steps to recover a deleted file:
-
In the "Results Pane" select the checkbox of the file or files to be recovered.
To select all files, right click on Filename then click Select AllItems from the menu.
-
Click the Recover File button to recover the selected files.
-
Click the Yes button in the "Possible Data Loss" popup box.
Recovered files are copied to the folder specified in the Recover selected file(s) to: section.
Settings
The "Settings" window provides access to NTFS Undelete's configuration. Although the default NTFS Undelete configuration has been set to optimize your recovery experience, there may be times where you may want to fine tune this configuration. Each of NTFS Undelete's settings are described below.

Default Settings
-
Check for update
Allows NTFS Undelete to check for updates when the program is launched. NTFS Undelete will check for updates weekly, every two weeks, or monthly. -
Send bug reports to WebMinds
Help us make our products better. Let us know the problems you are experiencing so we can fix them for the next version. -
Disable scan popup on program exit
Select this option if you do not want to be reminded about NTFS Undelete's advanced scan technologies when exiting NTFS Undelete. -
Keep folder structure
Restores files within their original folder tree to the drive path specified. This is very useful when restoring files from several different directories, as it allows you to see what folders the recovered files originally came from. -
Restore original timestamps
Restores files with the original Created and Modified dates. Unselect this option if you want to set the Created and Modified date and time to the date and time of the recovery. -
Enable FAT optimization
Helps to optimize and speed up the recovery process. -
Check file Type/Header information (takes a long time)
Ensures that the content of the file matches the file type. If not, this indicates that the file has been overwritten and will be omitted from the scan results. -
Enable SmartScan
The SmartScan will analyze your drive sector by sector looking for the file types you have selected. The SmartScan does not depend on the filesystem, thus making the SmartScan particularly useful after a drive has been formatted, or after an unrecoverable filesystem error has occurred. Note: This scan will take longer than the default scan and can take a few hours to complete depending on your drive size. -
Enable DeepScan
A DeepScan will analyze your drive cluster by cluster looking for files after the driver has been formatted. Note: This scan will take longer than the default scan and can take a few hours to complete depending on the size of your drive. - DeepScan Engine Tuning:
- Quality vs. Speed
If you have just recently deleted a file or files, setting the DeepScan to the highest Speed setting will most likely find and recover your file(s) in a very short amount of time. If you deleted the file(s) some time ago, or if the highest Speed setting does not recover your file(s) try using a slower/higher Quality scan setting. (Note: The highest Quality setting may take some time depending on the age of your PC and the size of your hard drive. - Ignore current filesystem (RAW-scan)
Scans the selected drive(s) sector by sector and ignores any current filesystem data structure. This is especially useful in the following scenarios:- The filesystem data structure has become corrupt or overwritten and some or all of the lost files cannot be found using the Standard Scan or Default DeepScan setting.
- It has been too long since the lost files were deleted that they cannot be identified due to overwritten filesystem data structures.
- Recently deleted files are not recovered with standard scan due to severe fragmentation that is common on FAT formatted drives.
- Detect existing files
Searches for nondeleted files on deleted partitions with undamaged filesystems. - Recover .UND files
Attempts to recover .UND files. - Detect zero-sized files
Includes files with no byte count in the list of potentially recoverable files. - Enable EFS restore feature
Recover files and/or folders that were encrypted using EFS prior to deletion. EFS encrypted files/folders can only be restored using the same user account that was used for the encryption of the file(s) or folder(s).
- Quality vs. Speed